VSOL GPON OLT Configuration CLI Mode Step by Step Guide

🔹 ভূমিকা:
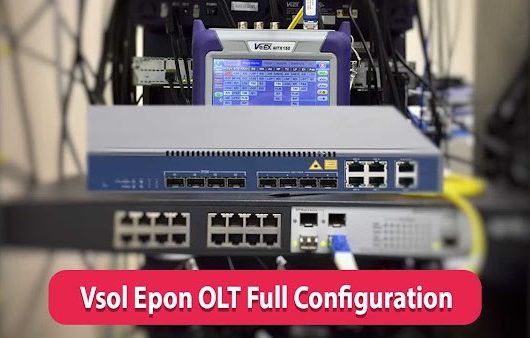
Hello friends! আজকের পোস্টে আমরা শিখব VSOL GPON OLT কীভাবে configure করা যায় step by step
আগে আমরা শিখেছি VSOL EPON OLT configure করা। VSOL GPON OLT configure প্রায় একই ধরনের, কিন্তু কিছু difference আছে। আজ আমরা সেই differences এবং full configuration দেখব।
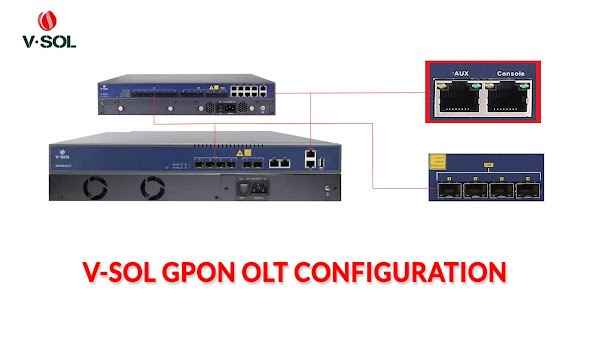

🔸 OLT Access

OLT configure করার জন্য প্রথমে login করতে হবে। VSOL GPON OLT login করা যায় 2 ways:

  1. AUX Port

  2. Console Port

AUX Port Access:

  • AUX port থেকে OLT access করতে Ethernet cable ব্যবহার করতে হবে।

  • PC এর Ethernet port এ IP address set করতে হবে। Default AUX IP: 192.168.8.200

  • উদাহরণ: PC IP = 192.168.8.10, Subnet = 255.255.255.0

  • Telnet বা Web management ব্যবহার করে OLT access করা যাবে:
    https://192.168.8.200

VSOL GPON OLT Default Info:

IP Address: 192.168.8.200
Username: admin
Password: Xpon@Olt9417#

🔸 Mainlink Configuration With VLAN

  • আমাদের OLT এ 8 GPON ports আছে।

  • আমরা uplink configuration করব 9 VLANs (500–508)।

  • Uplink port: G9, Mode: Trunk

Command:

gpon-olt> ena
enable password: Xpon@Olt9417#
gpon-olt# configure terminal
gpon-olt(config)# vlan 500 - 508
pon-olt(config)# exit
gpon-olt(config)# interface gigabitethernet 0/9
gpon-olt(config-if-ge0/9)# switchport mode trunk
pon-olt(config-if-ge0/9)# switchport trunk VLAN 500 - 508
gpon-olt(config-if-ge0/9)# exit

🔸 Assign IP Address for Remote Access (MGT)

gpon-olt(config)# interface vlan 500
gpon-olt(interface-vlan-500)# ip address 10.20.30.10 255.255.255.252
gpon-olt(interface-vlan-500)# exit
gpon-olt(config)# ip route 0.0.0.0/0 10.20.30.9

🔸 Telnet Enable

gpon-olt(config)# no login-access-list deny telnet 0.0.0.0 0.0.0.0

🔸 Creating ONU Profile

gpon-olt(config)# profile onu id 10 name xpononu
gpon-olt(profile-onu:10)# port-num eth 1
gpon-olt(profile-onu:10)# commit
gpon-olt(profile-onu:10)# exit
gpon-olt(config)# onu auto-learn default-onu-profile expon

🔸 Creating DBA Profile

gpon-olt(config)# profile dba id 10 name dbaxpon
gpon-olt(config)# type 4 maximum 1024000
gpon-olt(config)# commit
gpon-olt(config)# exit

🔸 Creating Service Profile

gpon-olt(config)# profile srv id 10 name srv_pon1_vlan_501
gpon-olt(profile-srv:10)# portvlan eth 1 mode tag vlan 501
gpon-olt(profile-srv:10)# commit
gpon-olt(profile-srv:10)# exit

🔸 Creating Line Profile

gpon-olt(config)# profile line id 10 name line_pon1_vlan_501
gpon-olt(profile-line:10)# tcont 1 name 1 dba dbagpon
gpon-olt(profile-line:10)# gemport 1 tcont 1 gemport_name 1
gpon-olt(profile-line:10)# service internet gemport 1 VLAN 501
gpon-olt(profile-line:10)# service-port 1 gemport 1 uservlan 501 VLAN 501
gpon-olt(profile-line:10)# commit
gpon-olt(profile-line:10)# exit

🔸 Bind Profile to PON Port

PON Port 1:

gpon-olt(config)# interface gpon 0/1
gpon-olt(config-pon-0/1)# onu auto-learn
gpon-olt(config-pon-0/1)# onu auto-learn srv-profile name srv_pon1_vlan_501
gpon-olt(config-pon-0/1)# onu auto-learn line-profile name line_pon1_vlan_501
gpon-olt(config-pon-0/1)# exit

একইভাবে, অন্য PON ports এর জন্যও service এবং line profile create করে bind করতে হবে।


🔹 Conclusion

আজ আমরা শিখলাম VSOL GPON OLT configure করা step by step
এখন আপনি সহজেই আপনার GPON OLT configure করতে পারবেন। যদি কোনো query থাকে, comment করুন, আমি support করব।

Related Post